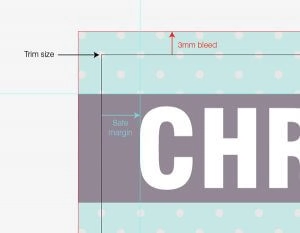
 Bleed is ink that prints beyond the trim edge of the page to ensure it extends to the edge of the page after trimming.
As there is a degree of movement when printing on any press, you should always create 3mm bleed on all edges where bleed is needed. Supplying your job without bleed may result in white lines when we trim it.
3 Important sizes or areas
Trim Size
This is the final size of your printed piece once the bleed has been removed. Check out our article on common print document sizes which has a helpful chart.
Bleed Size
This is 3mm of extra background and image area on all of the edges (all round). We cut off this excess at the finishing part of printing.
Safe Print Area
The area on your artwork where all the important information goes, 3mm in from the final trimmed size. We have this as a safe printing area so nothing essential gets chopped off your artwork.
Make sure all borders are at least 5mm from the trim edge to avoid any uneven borders.
How to setup bleed
The concept of applying bleed is the same for all desktop publishing programs. You need to extend the object box, whether picture or colour, 3mm outside the edge of your page.
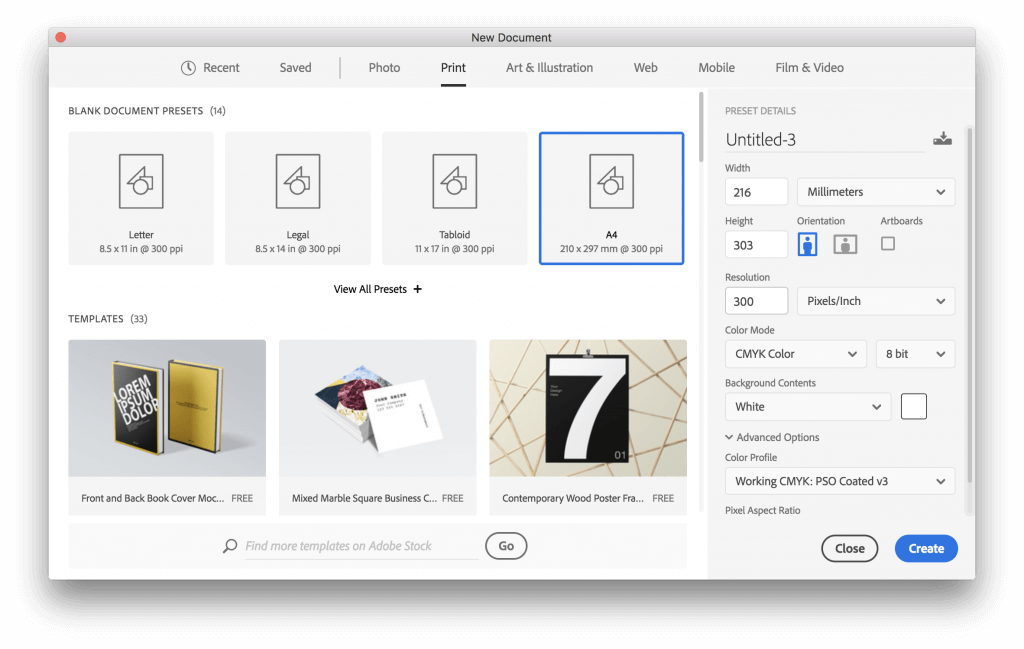
With Microsoft Word, PowerPoint or Adobe Photoshop you do not have the ability to add bleed when creating a PDF. You need to make your page/image size 6mm bigger at the start. You will then treat the extra 6mm (3mm all round) as bleed, which will be removed when we trim your job. For example, A4 is 210mm x 297mm. Your page with bleed will be 216mm x 303mm.
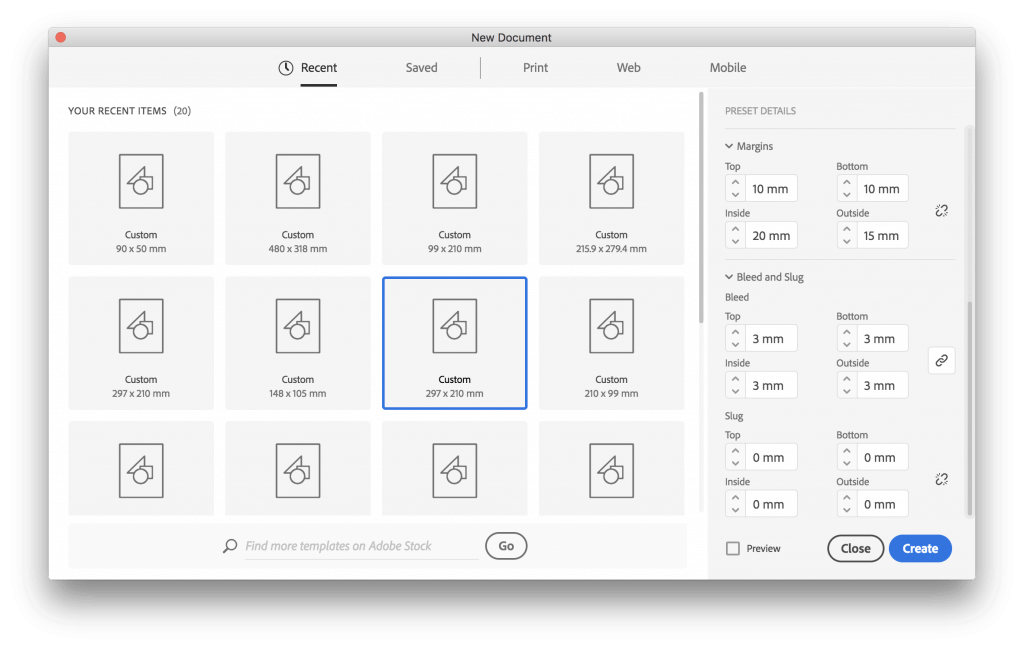
Adobe InDesign Bleed settings
When creating a new document in Adobe InDesign, if you are designing a book, you should tick the ‘facing pages’ option, to setup left and right facing pages (spreads); for all other types of artwork, leave this unchecked. The settings for bleed in InDesign are also in the Document Setup panel when you create a new file. They are in the side panel on the right, although you may need to scroll down below the margins to see where you can set the bleed to be 3mm for each side. Older versions of InDesign have this feature, however, you need to press the ‘more options’ button.
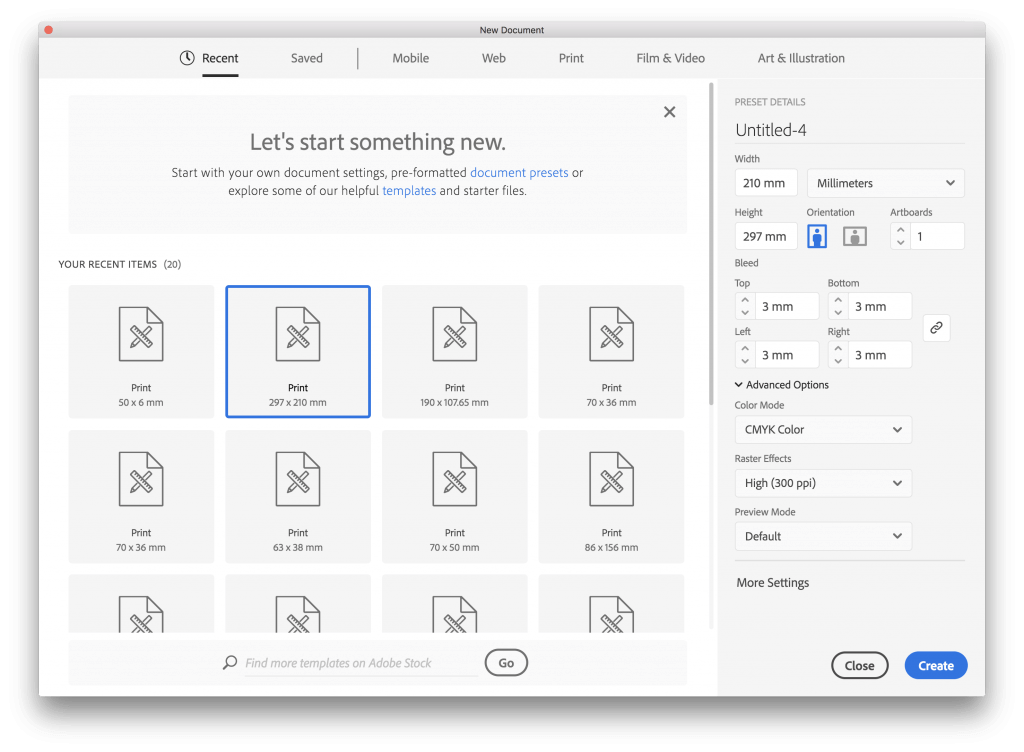
Adobe Illustrator Bleed settings
The settings in Illustrator are very similar to InDesign. When creating a new document, the settings for bleed are in the side panel on the right, below the document size. Make sure that your colour mode is set to CMYK and the Raster Effects are High (300dpi).
Adobe Photoshop Bleed settings
There are no bleed settings available in Photoshop when you make a new document. In other words: bleed is not a native element in Photoshop images.
However, it is possible to create a bleed yourself by adding the bleed size to the document size. For instance if your final image would be 297mm x 210mm, you would add 3mm to all document sides, making the image 303mm x 216mm. Ensure that the colour mode is CMYK and the resolution 300dpi.


