Colour Management
A colour-managed workflow will give you confidence to send a file to print. Use these instructions to ensure your images and designs reproduce accurately.

Setting up a colour managed workflow
ISO standards are a worldwide system of target values for printers to aim for, to reproduce a colour consistently in any country, any printing plant and any print or screen device, within a set tolerance.
Designers can setup their images and artwork using these profiles, and trust that their artwork will print accurately, provided it is saved correctly and viewed on a monitor calibrated to this same standard.
Step 1: Download Profiles
- FOGRA51 is the standard printing condition for coated papers printed by digital and offset printing
- FOGRA52 is the standard printing condition for uncoated papers printed by digital and offset presses.
To install these new standards on your computer for use by design applications, first download the profiles using the buttons below:
Step 2: Install Profiles
Expand the ZIP files and move the contents into the following folder:
Mac OS
- Open Finder and hold down the Option key and select the menu Go > Library, to open the User Library.
- Locate the ColorSync > Profiles folder, or if this folder structure doesn’t exist, create these new folders.
- Copy the new downloaded profiles into the Profiles folder.
- After installing the colour profiles, you must restart your applications.
Windows
- Right-click on the profile file you have extracted from the download ZIP files, and select ‘Install profile’.
- You can also copy the downloaded profiles to the folder Windows > System32 > spool > drivers > color.
- After installing the colour profiles, you must restart your applications.
Step 3: Download Adobe Colour Settings File
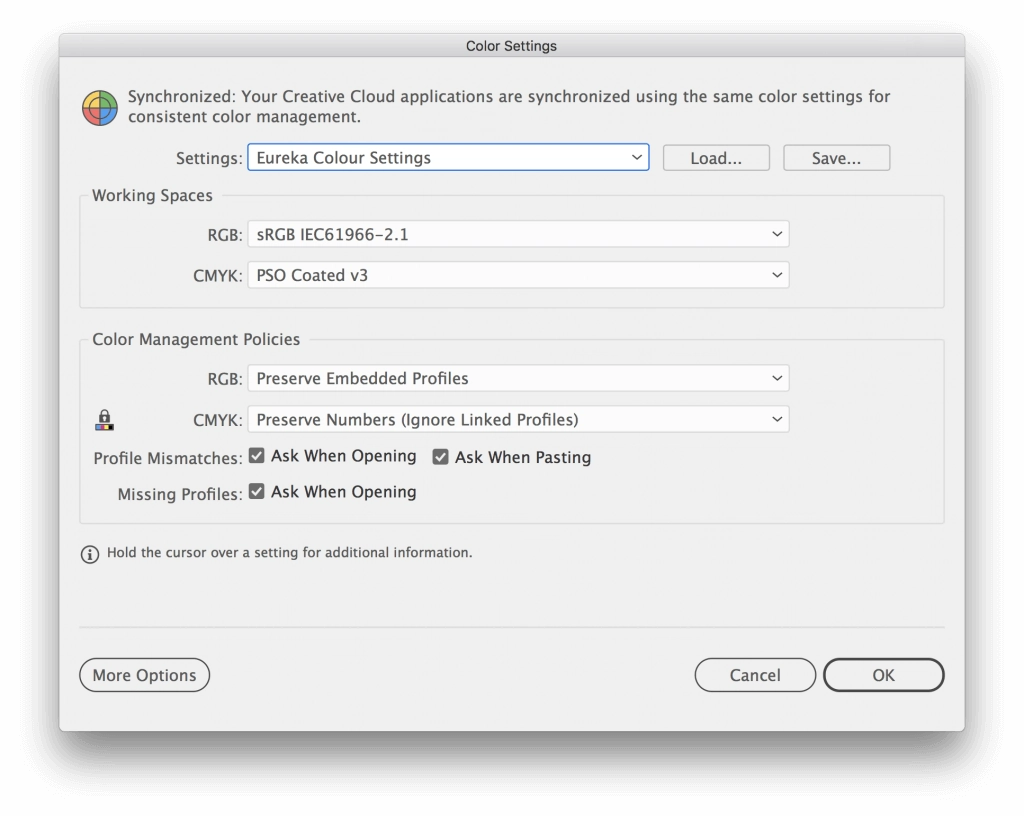
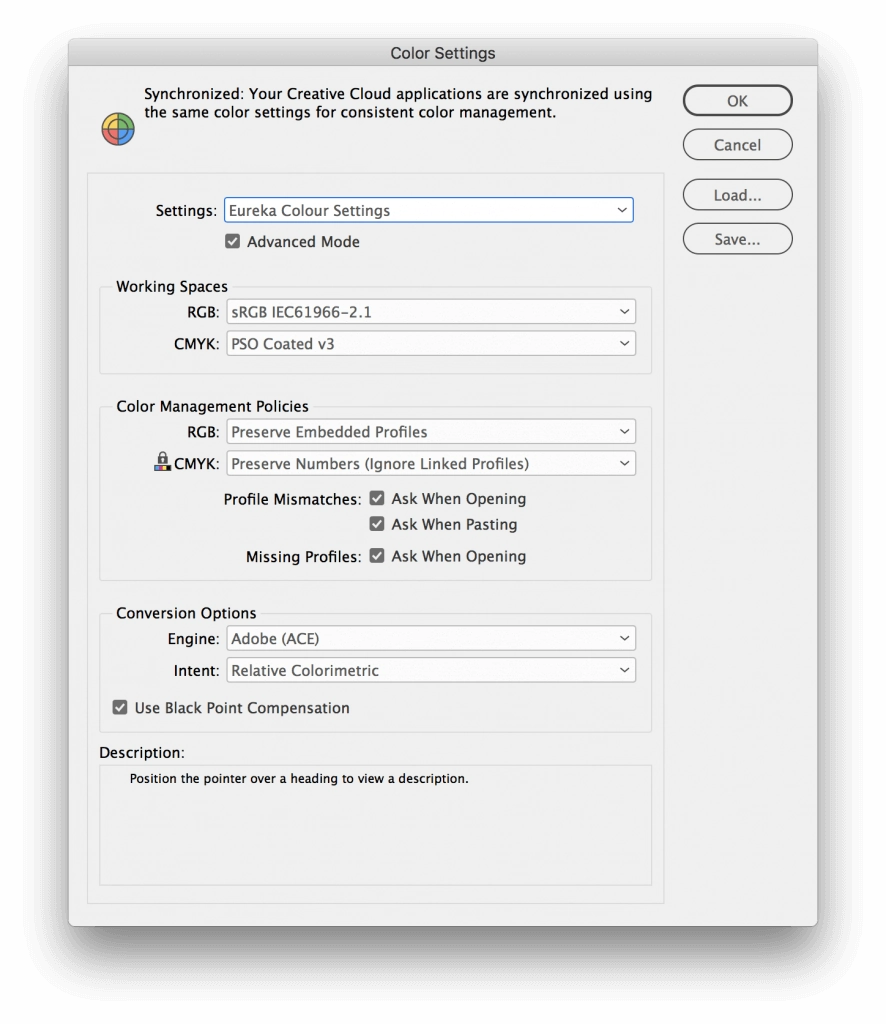
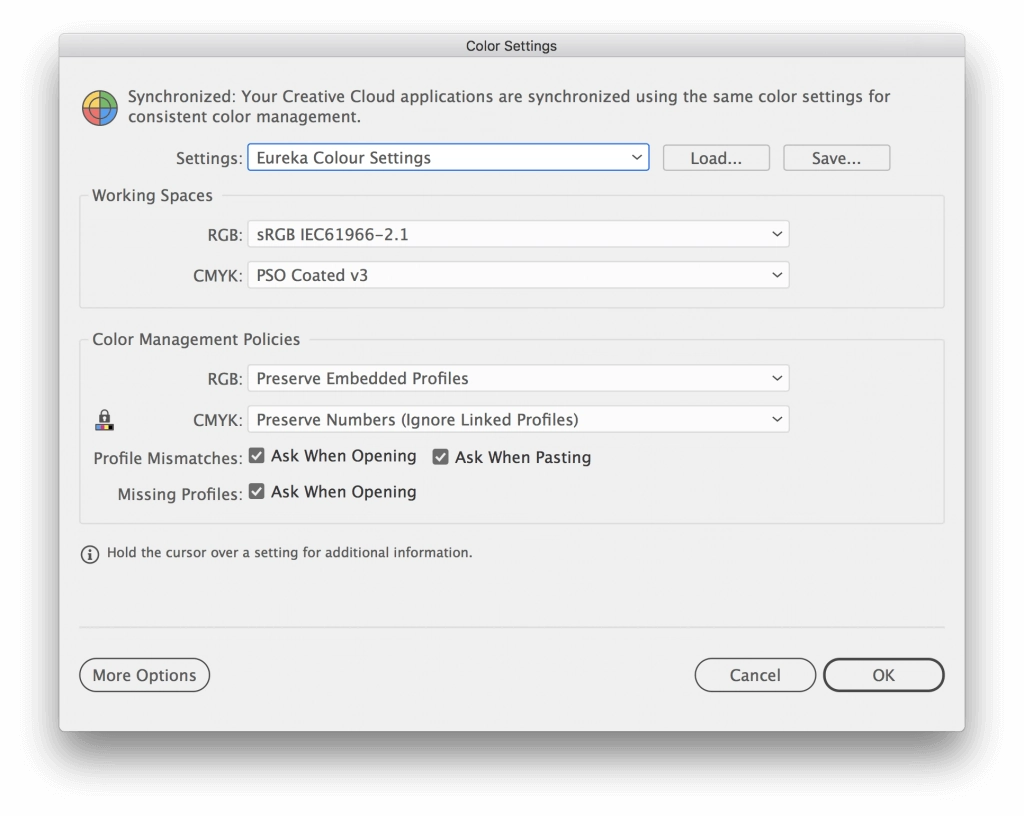
To set the Adobe applications to use the new profiles, you can download and install our application presets, or you can adjust the Adobe preferences manually using the screenshots below:
Step 4: Set Adobe Colour Settings
Mac OS
- Open Finder and hold down the Option key and select the menu Go > Library.
- Locate the Application Data > Adobe > Color > Settings folder, and copy the downloaded settings file into that folder.
- If you have Adobe Bridge (available for free to download for Creative Cloud users), open up the application and go to Edit > Color Settings.
- In the Color Settings panel, select Eureka Colour Settings and click Apply. This will synchronise the colour settings for all of your Adobe print design applications. Alternatively, you can follow the above process in each individual application instead of using Adobe Bridge, as the menu options are the same.
Windows
- Copy the downloaded settings file to the folder Documents and Settings > [User] > Application Data > Adobe > Color > Settings.
- If you have Adobe Bridge (available for free to download for Creative Cloud users), open up the application and go to Edit > Color Settings.
- In the Color Settings panel, select Eureka Colour Settings and click Apply. This will synchronise the colour settings for all of your Adobe print design applications. Alternatively, you can follow the above process in each individual application instead of using Adobe Bridge, as the menu options are the same.
Browse our checklist of specifications on image resolution, colours, fonts and bleed, to setup artwork ready for print
Read our guide which steps you through the process of converting a file into a PDF from different applications
Discover how to send an entire package of your InDesign artwork including links and fonts for us to finalise for print
Have a design or print project coming up?
We’d love to work with you, so contact our team to discuss
how our design and print service can help your business


